Preparing a refrigerator for storage is crucial to ensure that it remains in good condition during its time in storage. Here are the steps to prepare a fridge for storage:
1. Empty the Fridge: Remove all food items, including perishables, condiments, and leftovers.
2. Clean the Interior: Thoroughly clean the interior of the fridge. Remove shelves, drawers, and other removable parts and wash them separately with warm, soapy water. Wipe down all interior surfaces with a mixture of water and baking soda to remove any odors. Be sure to rinse and dry everything before putting them back in place.
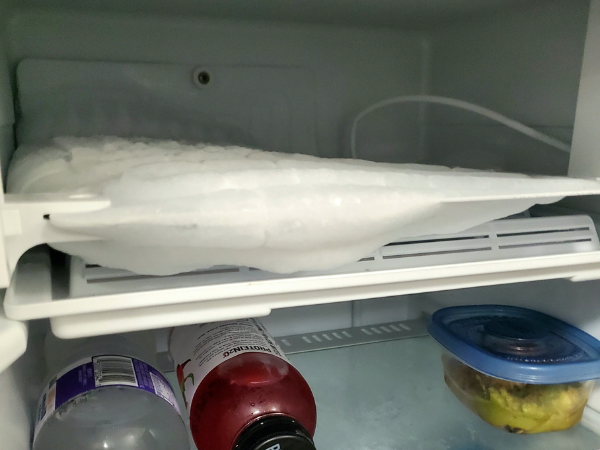
3. Defrost the Freezer: If your refrigerator has a freezer compartment, make sure it is fully defrosted. This may take several hours or even overnight. Place towels or absorbent material inside to catch any melting ice.
4. Disconnect and Unplug: Turn off the fridge and unplug it from the electrical outlet.
5. Remove and Secure Loose Parts: Remove any loose or removable parts such as shelves, drawers, and ice trays. Pack these separately to prevent damage during transit.
6. Clean the Exterior: Wipe down the exterior of the fridge with a mild detergent and water solution. This will help remove any dirt or residue and prevent it from hardening during storage.
7. Secure the Doors: Use rope or bungee cords to secure the doors in a slightly open position. This will ensure that the doors don’t accidentally close during storage.
IMPORTANT NOTICE: Collegeboxes reserves the right to decline the pickup of refrigerators that have not been unplugged for a minimum of two days before the scheduled pickup. Failure to unplug the refrigerator may lead to mold and mildew damage to other customers’ boxed items. Please ensure the fridge is unplugged at least two days prior to your scheduled pickup to guarantee our team’s ability to store the item.

How to Assemble Your Collegeboxes
Here's a step-by-step process to help you assemble your Collegeboxes faster and easier. 1. Remove Signature Collegebox from Supply Kit. 2. Flip box upside down and create a rectangle with the walls of the box. 3. Push smaller flaps down first, and then the larger...


